Showing posts with label Blogger Tips. Show all posts

Tuesday, August 23, 2011

Blogger | New GUI 2011 Is Here


Several months ago, we were promised a new look to the Blogger GUI. For the past couple months, a select few trusted testers had access to a preliminary version of the new GUI. This evening, they made the new GUI, 2011, available to everybody.


Just go to http://draft.blogger.com, and you'll see it.


There are lots of changes - some improvements, and other changes. They've solved a few problems - and possibly caused some others.

As you tryout the new GUI in Draft Blogger, you will have to carefully note that's where you are. Previously, when we would ask you to verify whether you were in Draft or Production Blogger, we might ask "Draft (blue logo), or Production (orange logo) Blogger?". Now, Draft Blogger, like Production Blogger, uses an orange logo.

So, when you ask for help in Blogger Help Forum: Something Is Broken, please be very careful and state whether you are using Draft ("draft.blogger.com") or Production ("www.blogger.com") Blogger. And if you're colour blind, don't worry about looking at the logo.


As you use the new GUI, and you find a confusing change or an essential feature missing, feedback to Blogger will be essential. Find the gear logo, in the upper right corner. Click on that, and select "Send feedback". Remember that this is Draft Blogger, which is where changes are tested, and you are now a Beta tester. Be objective, and be thorough.


And enjoy the New GUI, because the familiar Classic GUI is only a click or two away.

Sunday, August 14, 2011

Promote Your Blog and Increase Traffic


Blogging is an enjoyable habit especially for those who love writing and expressing themselves to others. Many people even make a living out of it. However, gaining profits in writing blogs is not an easy task especially if you are just starting your blogging career. Other than writing relevant content, driving traffic to your website is also essential and it is not an easy task. It takes time and persistence to build online history and gain consistent traffic. No traffic, no money.
To increase traffic to your blog, you have to be effective in your website promotion activities. This may include your blog appearance, SEO, social media promotions and email marketing.
See below:

Blog Appearance

  1. Blog ApperanceBlogging Platform: There are several good and free blogging platforms available online. Most famous platforms areWordPressJoomlaBlogger and Drupal. WordPress is the most preferred platform by many bloggers and it is also originally designed for blogging. But if you want to put some dynamic functionality like social networking and ecommerce features, you may consider using Joomla and Drupal.On the other hand, it is also possible if you want to create your own blog site from raw. Hence, it will take you more time unlike setting up a site using WordPress, Joomla or Drupal. Also, in using either one of these three options, several modules and plugins are already available for your convenience plus worldwide support communities that are willing to help you out with your platform issues.

  2. Color Theme: Your choice of colors is very important for your blog appearance. Through colors, you can trigger different emotions of your readers. Most blogs tend to use light colors for their backgrounds, and dark colors for the texts, (such as White & Black) this makes the content more readable for general users.

  3. Navigational Layout: Make your layout navigational. Organize your links and blocks well. Make your recent posts and most famous articles are accessible to your readers. Study and experiment well for your ad positions. Also, putting them in the right places can make your number of click through higher.

SEO (Search Engine Optimization)

  1. Relevant Content for Your Focused Niche: When we say relevant content, it means content that is helpful to readers.The web is continuously being updated every day, where users are continuously looking for good content that relates to them, aim to publish new content on a daily, or weekly biases that will link to your audience.

  2. Link Building: The number of back links is essential if you want higher page ranks. Like voting system, search engines will determine your website relevance with the number of link presence you have on the web.. These links can be achieved in various ways, Submitting to bookmarks is an effective link building activity, or by writing guest articles, or even networking on social media websites.

  3. Public Relations: Public relations like press release and article submissions can also help you promote your site, increase back links and expose more your website.

  4. Ping: Submitting to ping sites like Ping-O-Matic everytime you made changes in your site can trigger the search engines to visit your website and index your new pages.

Social Media Promotions

  1. Twitter: Recently, Google started indexing twitter pages. Therefore, whatever you tweet in connection to your website will affect your online presence. Be creative with your tweets, add your keywords and link them to your website. However, re-tweet other helpful posts also to gain more followers.

  2. Facebook: Facebook is now the largest social networking site on the web. Everyday billions of users are interacting on this site, which is an enough reason to invest time and promote your websites on Facebook.

  3. Other Online Community and Blogging Sites: Aside from Twitter and Facebook, investing time to other blogging sites and online communities like forums and other social networking sites can gain more exposures to your websites. Prevent spamming, post relevant comments that would help others. With this, you are not only promoting your blog, but you are also building relationships to your peer bloggers.

  4. Commenting on other blogs: Create a list of blogs that you would read regularly, and which relate to your business. Aim to leave useful comments on articles that are published on these blog, be creative with your comments, by writing comments that would provide extra value to the post and readers.

  5. Forums: A good way of building your presence and getting users to your blog, is by using forums. Register with forums within your niche, and answer few questions that the users ask, do this regularly, over time you would build your brand awareness and start to drive traffic to your site. When answering questions, be as helpful as you can, and provide answers that would be effective and helpful to all reading that question.

Email Marketing

  1. Email MarketingPitch Page for Mailing List: Sending emails to people who do not give you any permission to do so is loud and clear spamming. Do not do this. Create a pitch page or pitch block in your website where your readers can submit their email address to subscribe to your newsletters. You can get embed codes for this by using tools like Aweber autoresponder or FeedBurner.

  2. Good Layout and Content: Sending an attractive and corporate looking e-newsletter can prevent your recipients to hit the “spam” button. Be creative with your layout and give them good content. Put links directing to your website. Also, offering some games, rewards or other promotions can be a good call to action to your readers to visit your blog.

Guest Blogging

Last but not the least also, have a presence as a guest blogger on various authority and related sites of your industry. As guest bloggingis more than writing a blog post for some other blog, it has got many benefits, which can improve your image as a blogger and also help you promote your own blog by reaching out to communities established by these blogs.
Best is to write guest posts for other blogs and also invite and publish guest posts on your own blog. This gives maximum exposure to your blog and helps you reach out multifold on the web by opening doors for other SEO and social media benefits attached to guest blogging. Hence, this can be termed as a win-win situation where the blogger and the blog both benefit in various ways.
There are so many things that you may do to gain maximum exposure for your blog. Also, give time to research for useful tools to automate your blog sharing and make your promotion easier. Pursue the marketing and outreach of your blog keeping abreast with new ideas and methods on the web as internet marketing keeps evolving and every time you come across a new platform consider how you can portray your business.

Saturday, July 16, 2011

Download - SEO Tools For Blogger


Get SEO tools For Blogger Downloads Here
This tool good for Blogger SEO
caused Will give more trick to find your blogger keywords, tools who linked your blogger  and more !

How to Improve OR Increase Alexa Traffic Rank


Improve ( increase ) Alexa rank
Improve ( increase ) Alexa rank A collection of methods which can improve your Alexa Traffic Rank What is the Alexa Rank? In simple terms, the Alexa Rank is a ranking system of your website which bases its ranking on the level of traffic each website receives from the number of people who visit a website with the Alexa toolbar installed. The most important element of any website is content – good quality informative content cannot be beaten when trying to get a good page rank. The more people who visit your website and return or recommend it, the more your traffic will naturally increase. Below are a few methods that can help to improve your alexa rank :
1) Install the Alexa toolbar on your computer and request that anyone who knows you do the same.
2) Put an Alexa rank widget on your website. Each click can count as a visit even if the toolbar is not used by the visitor.
3) Write an article or blog on Alexa. Webmasters love searching methods to improve their sites. Webmasters are also very likely to have the Alexa toolbar installed. Each visit will increase your alexa rank.
4) Use forums to post messages that include your url. Try and make your post interesting to encourage readers to visit your site.
5) Make use of social networking sites. Get your website Dugg and you could increase traffic. Make sure anything that is Dugg is note worthy.

How to remove Navbar In Blogger


That’s the thing which everyone want to remove from his blog. Now it’s time to do it and i will help you.
But first of all i want to tell you what exactly is the blogger navbar. It gives a few options:
-to search in the blog
-to go to random chosen blog
-to mark the blog as spam

If you don’t want to have this navbar on your blog anymore just login in your blogger account, then to Layout, then to Edit HTML and after that you should put this code somewhere in before the end of HEAD tag:
 
 
#navbar-iframe {
display: none !important;
}

Wednesday, July 13, 2011

Adding floating social media sharing buttons to Blogger


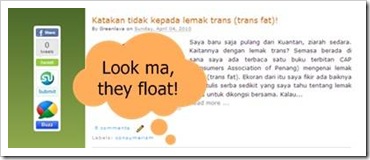
As promised to some of my readers, here’s a tutorial on how to add a Mashable-like floating bar of social media buttons to a Blogger blog. I made it into a widget, so you don’t have to go into your template HTML to install (or remove) them. Just drop the whole code into a HTML/Javascript gadget.
I have included Facebook Share, Retweet, Stumble, Google Buzz, Digg This and Google +1 (plus one) buttons in the bar. Each of them comes with a live counter. The corners of Facebook Share button and counter are rounded to blend with the rest of the buttons (doesn’t work in Internet Explorer, of course). You can add more social bookmarking or sharing buttons later if you wish.
floating social bookmarking buttons

I. Adding the buttons

  1. Login to your Blogger account.
  2. Go to Design > Page Elements.
  3. Click Add A Gadget.
  4. In Add A Gadget window, select HTML/Javascript .
  5. Copy the code below and paste it inside the content box. 
<!-- floating page sharers Start bloggersentral.com-->
<style>
#pageshare {position:fixed; bottom:15%; margin-left:-71px; float:left; border-radius:5px;-moz-border-radius:5px;-webkit-border-radius:5px;background-color:#fff;padding:0 0 2px 0;z-index:10;}
#pageshare .sbutton {float:left;clear:both;margin:5px 5px 0 5px;}
.fb_share_count_top {width:48px !important;}
.fb_share_count_top, .fb_share_count_inner {-moz-border-radius:3px;-webkit-border-radius:3px;}
.FBConnectButton_Small, .FBConnectButton_RTL_Small {width:49px !important; -moz-border-radius:3px;/*bs-fsmsb*/-webkit-border-radius:3px;}
.FBConnectButton_Small .FBConnectButton_Text {padding:2px 2px 3px !important;-moz-border-radius:3px;-webkit-border-radius:3px;font-size:8px;}
</style>
<div id='pageshare' title="Get this from BloggerSentral.com">
<div class='sbutton' id='fb'>
<a name="fb_share" type="box_count" href="http://www.facebook.com/sharer.php">Share</a><script src="http://static.ak.fbcdn.net/connect.php/js/FB.Share" type="text/javascript"></script>
</div>
<div class='sbutton' id='rt'>
<script src="http://tweetmeme.com/i/scripts/button.js" type='text/javascript'></script>
</div>
<div class='sbutton' id='su'>
<script src="http://www.stumbleupon.com/hostedbadge.php?s=5"></script>
</div>
<div class='sbutton' id='digg' style='margin-left:3px;width:48px'>
<script src='http://widgets.digg.com/buttons.js' type='text/javascript'></script>
<a class="DiggThisButton DiggMedium"></a>
</div>
<div class='sbutton' id='gb'>
<a class='google-buzz-button' data-button-style='normal-count' href='http://www.google.com/buzz/post' title='post on google buzz'>
<script src='http://www.google.com/buzz/api/button.js' type='text/javascript'></script>
</a></div>
<div class='sbutton' id='gplusone'>
<script type="text/javascript" src="https://apis.google.com/js/plusone.js"></script>
<g:plusone size="tall"></g:plusone>
</a></div>
<div style="clear: both;font-size: 9px;text-align:center;">Get <a href="http://www.bloggersentral.com/">widget</a></div>
</div>
<!-- floating page sharers End -->
 
 
  1. Save the gadget.
  2. Drag the gadget and reposition it under Blog Posts gadget.
  3. Click Save button on upper right corner.

II. Customizing

  1. Vertical alignment
    Change the value of bottom in code line 2. The code positions the button relative to the bottom of your browser window. To fix the distance even when window is resized, specify the value in px (pixels) instead of %.
  2. Horizontal alignment
    Change the value of margin-left in code line 2. Negative value pushes the button to the left of the main blog column, positive value pushes it to the right.
    To position the button relative to the left or right edge of browser window, replace the margin-left with left (as in left:10px;) or right (as in right:10px;) respectively.
  3. Replacing and removing buttons
    You can replace existing buttons with your own. Each button is represented by this code: 
<div class='sbutton'>
BUTTON CODE
</div>
 
To replace the button, simply replace the button code with the new code. 
To remove the button, delete the whole div.
Enjoy!


Update Your Status across all main Microblogging and Social Networks @ Ones


Update Your Status across all main Microblogging and Social Networks at ONCE!

Fed up with signing in to all your Microblogging and Social Networks, updating your status and reading your friends’ updates??? How about updating your status of various Microblogging and Social Networking sites simultaneously and instantaneously?! This service is provided by HelloTxt.com!


With HelloTxt you can post your status once and have it appear automatically on all of your networks, allowing you to keep all of your friends up to date with ease. It also lets you read your friends’ updates from main microblogging and social networks all at once!


You can update your status on the website, or using email or even from your mobile phone! You can also embed photos and video right into your status updates. Your personal data is encrypted and highly protected at all times.
You can visit their FAQ page for more information.
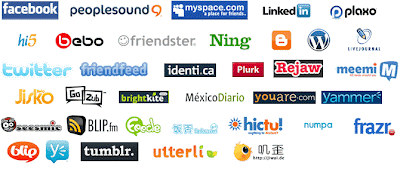
Screenshot of supported Social Networking and Microblogging websites:

Update Your Status across all main Microblogging and Social Networks at ONCE!

Hope you find it very useful! Drop Comments! Best Wishes!

Get Free Google+ WordPress Theme – WP Plus


Google-plus-wordpress

It’s been a Google Plus news all around the web last few days. Hot topics included [Google+ vs Facebook], [Google+ invites], [Google+ tips and tricks] and so on. Now let us link Google+ and WordPress :) . If you have a wordpress blog and love Google+, then you can ‘convert’ your wordpress blog into a Google+ look through an awesome wordpress theme called as WP Plus designed by TricksDaddy.
WP Plus is designed exactly like Google plus with same header, sidebar and color combinations. It is a free 3-column wordpress theme with sidebars on both sides. This is one of the best SEO wordpress themes with less images used and fast loading.

Screenshot

free Google+ wordpress theme

Features of WP Plus Theme

  • Based on Google+
  • xHTML and CSS valid
  • WordPress Custom Menus compatible
  • WordPress Custom Background compatible
  • Fixed width
  • 3 Columns
  • SEO Optimized
  • Styled sticky post
  • Fast loading
  • No graphics at all
  • Free of cost!
Demo | Download Page

Enjoy Blogging!

Importance of Main Navigation Bar for a Website/Blog


navigation bar for a blog or website


The layout of a website serves two purposes. The layout should provide a pleasant experience for the reader and it should direct readers towards specific actions. A well designed layout makes the reader comfortable. Very comfortable. So comfortable that they do not realize you are directing them towards a specific action.
Most websites have the same basic layout. A header, a navigation bar, body and footer. There are countless ways to skin a cat (slice down the center and peel back, burn with blow torch, drop into bucket of acid) but variations in this basic website layout are limited.
One aspect of the layout you can fiddle with is the location of the main navigation bar.
As the name suggests, the function of the main navigation bar is to allow readers access to the main sections of your website. With the main navigation bar the reader can jump to your about page, the contact page, archives or products page. It gets a lot of attention from your readers so it is important that you think hard about where you place it.
You can decide to place the navigation bar either at the very top of the page or in between the banner and the body.

Reasons to put Main Navigation Bar Between the Body and the Header

Some websites has the navigation bar between the banner and the body. This has many benefits:
  1. Readers do not need to scroll all the way to the top of the page to go to another section on the website. It seems like a small point, but for a lot of people flicking the finger to roll the mouse wheel is considered work.
  2. The navigation bar gets more eye time. If your navigation bar is at the very top of the page then even a single increment of the mouse wheel hides the navigation bar. A navigation bar under the banner gives the reader more opportunity to jump to another page even if they are half way down a post.
  3. A navigation bar serves as a perfect divider between sections. Header, navigation bar, body is classic website design. It feels natural, has been around for ages and offends nobody.

A Reason to Put Your Navigation Bar at the Top of the Page

Some websites have the navigation bar under the banner which has the advantages mentioned above. But there are popular websites that have the navigation bar at the very top of the page.
Why would you want to put the navigation bar at the very top of the page?
The answer has to do with advertising and eyeball movements.
If your website has an advertisement in the header section then it only makes sense to put the navigation bar at the very top of the page. This ensures that the reader’s eye must move over the advertisement before navigating to another page.
By placing the navigation bar at the top of the page you increase the number of times readers see advertisements. And of course, the more times they see them the greater the chance they will click them.
If you want to direct your readers towards advertisements in the header you should consider placing the navigation bar at the top of the page. You force readers to notice the advertisement as they move between content and navigation.
Of course for this layout change to make a difference the fundamental rule still applies. You need engaging content. You need readers to want to go to other pages on your website. You need them to be interested enough in what you are saying to put in the extra effort of scrolling all the way to the top to visit your about or contact page. Without good content, it does not matter where your navigation bar is located. Without good content you do not need a navigation bar because the only button readers will be pressing is the close button.

7 Great Ways To Promote Your New Blog


7 Great Ways To Promote Your New Blog


Although all you need to start a new blog is an idea and an internet connection, if you want your blog to have an audience you have to put in a bit more leg work. Yes, you need to update your blog regularly and have interesting graphics, but without promotion, your blog will remain unnoticed.
Some people are intimidated by the idea of promoting, especially when they are the product that is being promoted. But don’t fret. I’m about to give you seven tips that will help you get the ball rolling.

Study

Make a list of blogs, authors and websites that you love. Then take a good hard look at that list. What makes you so fond of the blogs that you chose? What can you learn from these sites? Things to keep an eye out for are: how often these authors add new content to their blog, and what sites they link to. Learn everything you can from the people you admire and apply what you learn to your own blog.

Make A Video

Videos are becoming de rigueur for marking everything from bands to products to magazines. All you need to produce a video is a digital camera (most have video capabilities) and some video editing software (which you can find for free with a simple Google search). Explain who you are, what your blog is about and why they should take a look, then upload your video to sites like YouTube and TubeMogul.

Guest Post

Writing guest posts for other blogs is a great way to get your name out there in the blogosphere. While it’s great to aim for the stars, in this case starting small is best. Look for smaller blogs that cover interesting topics and offer to write a guest post. Chances are the blog’s author will welcome the help.

Podcast

Ever thought about producing a podcast? Just like videos, podcasts are inexpensive to produce and can get you new readers by tapping into a market you may have overlooked before. Your podcast should deal with the same subject you cover in your blog, but in a more overall way. After you make your podcast, upload it to the iTunes directory.

Blog Carnivals

A Blog Carnival or Blog Roundup is a kind of “best of” article that pulls information from lots of different blogs together in one post. Look for blogs that are hosting blog carnivals that relate to your blog’s subject and submit your best posts. Can’t find any? Then take matters into your own hands and start your own Blog Carnival and ask your fellow bloggers to submit their work to you.

Social Media Buttons

This is one of my favorite promoting gimmicks. Social media buttons allow the people who do read your blog to share the content to everyone in their social media networks. Make sure to include all the big guns: Facebook, Twitter, LinkedIn. Social media site are powerful tools when it comes to promoting and should never be overlooked.

Interviews

Approach successful bloggers and experts in the field your blog covers and ask if you can interview them for your blog. Interviews are a great way to learn from bloggers who have been in the game for longer than you have, and pull in new readers by using a marquee name in your posts.
When it comes to promoting your blog, anything goes. Be creative, don’t be afraid, hand out flyers, shout it from the mountain tops.