Showing posts with label twitter. Show all posts

Saturday, July 16, 2011

GooglePlus (G+) status with FACEBOOK - Sync


Sync your Google+ (Google Plus) status with Facebook ?


How to sync G+ status with FB ( Facebook ) ? 

So are you on Google+ yet ? If you are already there and lucky enough to get invitation from Google or any of your friend, you might want to sync your g+ status with facebook, because some of you still don’t want to loose facebook also :)
Although, till todate, Google has not come up with any of the G+ API (they will come soon), but still there is way to sync the Google Plus status with facebook or even twitter ? :)


Yes, all you have to do :

Step 1: Go to http://facebook.com/mobile and get your personalized email address which can be used to post pic and post statuses on the facebook. (This is something which is private for you)

Step 2: Go to https://plus.google.com/ and go to the section where you can invite your friends to your G+ profile. This section can be seen usually on top right corner of G+ main page.

Step 3: Click on “Add a New Person” and write your personalized  facebook email address which you got in Step 1.

Step 4: Drag this address to the circle below to create a new circle, since this email address cannot be seen publicly, so you need to create a new circle which should be hidden by others. You can do all privacy settings about circles, by going into the Privacy options in
Google+.

Step 5: You are all set, now whenever you are updating your status at Google+, include your hidden circle that contins the facebook email and check the box which says ‘Also emil xxx people’ . Since your facebook email is not using Google+ so your status will be sent to facebook via this email.

Cool ? … yes … till you get any plugin or any other tweaks by developers, I think this is enough for you.

You can do the same steps for other social network also. For example: http://ping.fm offers you to update status on several networks via one personalized email address. You can use ping.fm for your G+ – Twitter sync as well.

Make sure you care about ‘Privacy’.

Join me On...
FB - http://www.facebook.com/qadir2111
G+ - http://profiles.google.com/qadir2111
 

Wednesday, July 13, 2011

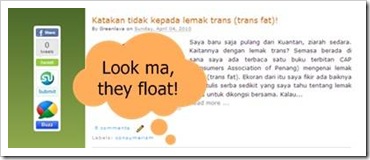
Adding floating social media sharing buttons to Blogger


As promised to some of my readers, here’s a tutorial on how to add a Mashable-like floating bar of social media buttons to a Blogger blog. I made it into a widget, so you don’t have to go into your template HTML to install (or remove) them. Just drop the whole code into a HTML/Javascript gadget.
I have included Facebook Share, Retweet, Stumble, Google Buzz, Digg This and Google +1 (plus one) buttons in the bar. Each of them comes with a live counter. The corners of Facebook Share button and counter are rounded to blend with the rest of the buttons (doesn’t work in Internet Explorer, of course). You can add more social bookmarking or sharing buttons later if you wish.
floating social bookmarking buttons

I. Adding the buttons

  1. Login to your Blogger account.
  2. Go to Design > Page Elements.
  3. Click Add A Gadget.
  4. In Add A Gadget window, select HTML/Javascript .
  5. Copy the code below and paste it inside the content box. 
<!-- floating page sharers Start bloggersentral.com-->
<style>
#pageshare {position:fixed; bottom:15%; margin-left:-71px; float:left; border-radius:5px;-moz-border-radius:5px;-webkit-border-radius:5px;background-color:#fff;padding:0 0 2px 0;z-index:10;}
#pageshare .sbutton {float:left;clear:both;margin:5px 5px 0 5px;}
.fb_share_count_top {width:48px !important;}
.fb_share_count_top, .fb_share_count_inner {-moz-border-radius:3px;-webkit-border-radius:3px;}
.FBConnectButton_Small, .FBConnectButton_RTL_Small {width:49px !important; -moz-border-radius:3px;/*bs-fsmsb*/-webkit-border-radius:3px;}
.FBConnectButton_Small .FBConnectButton_Text {padding:2px 2px 3px !important;-moz-border-radius:3px;-webkit-border-radius:3px;font-size:8px;}
</style>
<div id='pageshare' title="Get this from BloggerSentral.com">
<div class='sbutton' id='fb'>
<a name="fb_share" type="box_count" href="http://www.facebook.com/sharer.php">Share</a><script src="http://static.ak.fbcdn.net/connect.php/js/FB.Share" type="text/javascript"></script>
</div>
<div class='sbutton' id='rt'>
<script src="http://tweetmeme.com/i/scripts/button.js" type='text/javascript'></script>
</div>
<div class='sbutton' id='su'>
<script src="http://www.stumbleupon.com/hostedbadge.php?s=5"></script>
</div>
<div class='sbutton' id='digg' style='margin-left:3px;width:48px'>
<script src='http://widgets.digg.com/buttons.js' type='text/javascript'></script>
<a class="DiggThisButton DiggMedium"></a>
</div>
<div class='sbutton' id='gb'>
<a class='google-buzz-button' data-button-style='normal-count' href='http://www.google.com/buzz/post' title='post on google buzz'>
<script src='http://www.google.com/buzz/api/button.js' type='text/javascript'></script>
</a></div>
<div class='sbutton' id='gplusone'>
<script type="text/javascript" src="https://apis.google.com/js/plusone.js"></script>
<g:plusone size="tall"></g:plusone>
</a></div>
<div style="clear: both;font-size: 9px;text-align:center;">Get <a href="http://www.bloggersentral.com/">widget</a></div>
</div>
<!-- floating page sharers End -->
 
 
  1. Save the gadget.
  2. Drag the gadget and reposition it under Blog Posts gadget.
  3. Click Save button on upper right corner.

II. Customizing

  1. Vertical alignment
    Change the value of bottom in code line 2. The code positions the button relative to the bottom of your browser window. To fix the distance even when window is resized, specify the value in px (pixels) instead of %.
  2. Horizontal alignment
    Change the value of margin-left in code line 2. Negative value pushes the button to the left of the main blog column, positive value pushes it to the right.
    To position the button relative to the left or right edge of browser window, replace the margin-left with left (as in left:10px;) or right (as in right:10px;) respectively.
  3. Replacing and removing buttons
    You can replace existing buttons with your own. Each button is represented by this code: 
<div class='sbutton'>
BUTTON CODE
</div>
 
To replace the button, simply replace the button code with the new code. 
To remove the button, delete the whole div.
Enjoy!